
Carpet tiles are a smart flooring choice to enhance the ambiance of your floors. These tiles are easy to handle and customize, and perfect for all home and business spaces. To ensure the longevity and sustainability of your floors, you need to install them in the right way.
This blog will help you learn the ways to install your carpet tiles with adhesives like a pro. Whether you are a beginner or a DIY enthusiast, this guide will help your job without any hassle.
Why Choose Carpet Tiles?
Before jumping into the installation process of Carpet tiles, you must understand why there is a need to choose carpet tiles.
- These tiles need no stretching or tracking.
- You can choose customized designs in different patterns and colors.
- You also have the option to replace damaged tiles.
- These carpet tiles are budget-friendly and ideal for tight budgets.
- They offer easy cutting and perfectly fit into awkward spaces.
Tools and Materials Needed
Before starting the installation process, make sure you have the following tools and materials:
- Carpet Tiles
- Pressure-sensitive adhesive
- Adhesive roller
- Utility knife
- Measuring tape
- Chalk line or a laser level
- Straightedge or metal ruler
- Knee pads
- Vacuum or broom
- Safety gloves and masks
Installation Steps for Carpet Tiles
Prepare the Surface
Proper surface preparation is key to accurate results. You can start by clearing your room, moving furniture, rugs, and other things. Then inspect the floor thoroughly.
- Carpet tiles are a perfect choice for concrete, plywood, and vinyl floors.
- Sweep, vacuum, and mop the floor to remove any dust and debris.
- Fill all the cracks and smooth all uneven spots using a floor levelling compound.
Do not install Carpet Tiles on dusty, greasy, and moist surfaces. These surfaces resist the adhesion of adhesives.
Plan Your Layout
To get a symmetrical and balanced look, you will be needing proper layout of these tiles.
Find center of the room
With the help of a measuring tape, you can draw intersecting lines across the width and length of the room. This will help you find the center of your room.
Dry Lay the Tiles
You can estimate your tiles coverage by laying few tiles without adhesive. This way, you can find their symmetry and the point where they meet is the center of the room.
Choose your layout pattern
You can choose from differnt layout pattern to get your floor tiles installed. In Monolithic pattern, all tiles are aligned in the same direction. In Quarter turn pattern, each tile is rotated 90 degrees. While on Brick or Ashlar pattern, tiles are alined in staggered rows or columns.
Apply the adhesive
After alignment, you need to add adhesive on thr floor. Always consider presssure senstive adhesive which allows repositioning before final bonding.
- Start applying adhesive in smaller sections and use a notched trowel to sprread it informally.
- After applying, let the adhesive set until it becomes tacky. Leave it for 15-30 mins depending on room conditions and humidity.
- While using strong adhesive, always read the manufacturer instructions. Each adhesive have different during time and application method.
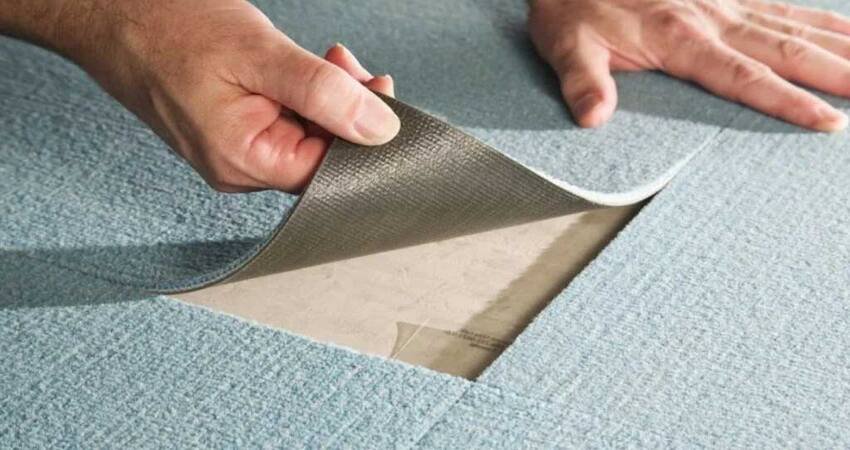
Install the Carpet Tiles
While Carpet installation, start placing tiles from your centre point and follow on chalk lines. Press each tile firmly into the adhesive for better bonding. While adding tiles row by row, make sure the edges are snug but not forced.
Avoid any kind of tile overlapping when installing. Once you have laid a few rows, use a floor roller to ensure full contact between tiles and adhesive.
Cut Tiles for Edges and Corners
When you reach corners and doorways, you will need to cut these tiles for a perfect fit.
- Measure the space and gap by using a tape.
- After flipping the tiles upside down, mark the areas where to cut. Use a sharp knife or blade for clean and aligned cuts.
- Always dry fit the cut piece before applying any kind of adhesive.
- After applying the adhesive, place the cut tile snugly against the wall or corner.
- Wear gloves and safety gear, as these adhesive contain strong chemicals.
Final Touches
Once you are done with installation, look for loose corners and gaps. Better to press them again for the desired results. Don’t allow heavy traffic right after applying the adhesive. Let the adhesive set for at least 24 hours. Clean up excess adhesive with a mop or a special cleaner before it dries.
Maintenance Tips for Carpet Tiles
Better care and maintenance increases the lifespan of these floor tiles. You should clean and vacuum regularly to keep your carpet tiles clean and fresh. Do immediate spot cleaning with mild detergent and water. Rotate all the tIles occasionally to even out all fading and wear. These carpet tiles can easily be lifted, cleaned and maintained.
Final Thoughts
The installation of carpet tiles with adhesives needs proper knowledge and tools. This enhances the overall look of your space without breaking your budget. With the help of the right tools and some patience, you can seamlessly execute the installation of these carpet tiles. The above guide will help you achieve a smooth and professional-looking floor.
Roll up your sleeves and transform your space. Contact Carpets Dubai to avail yourself of our carpet installation services at your doorstep


